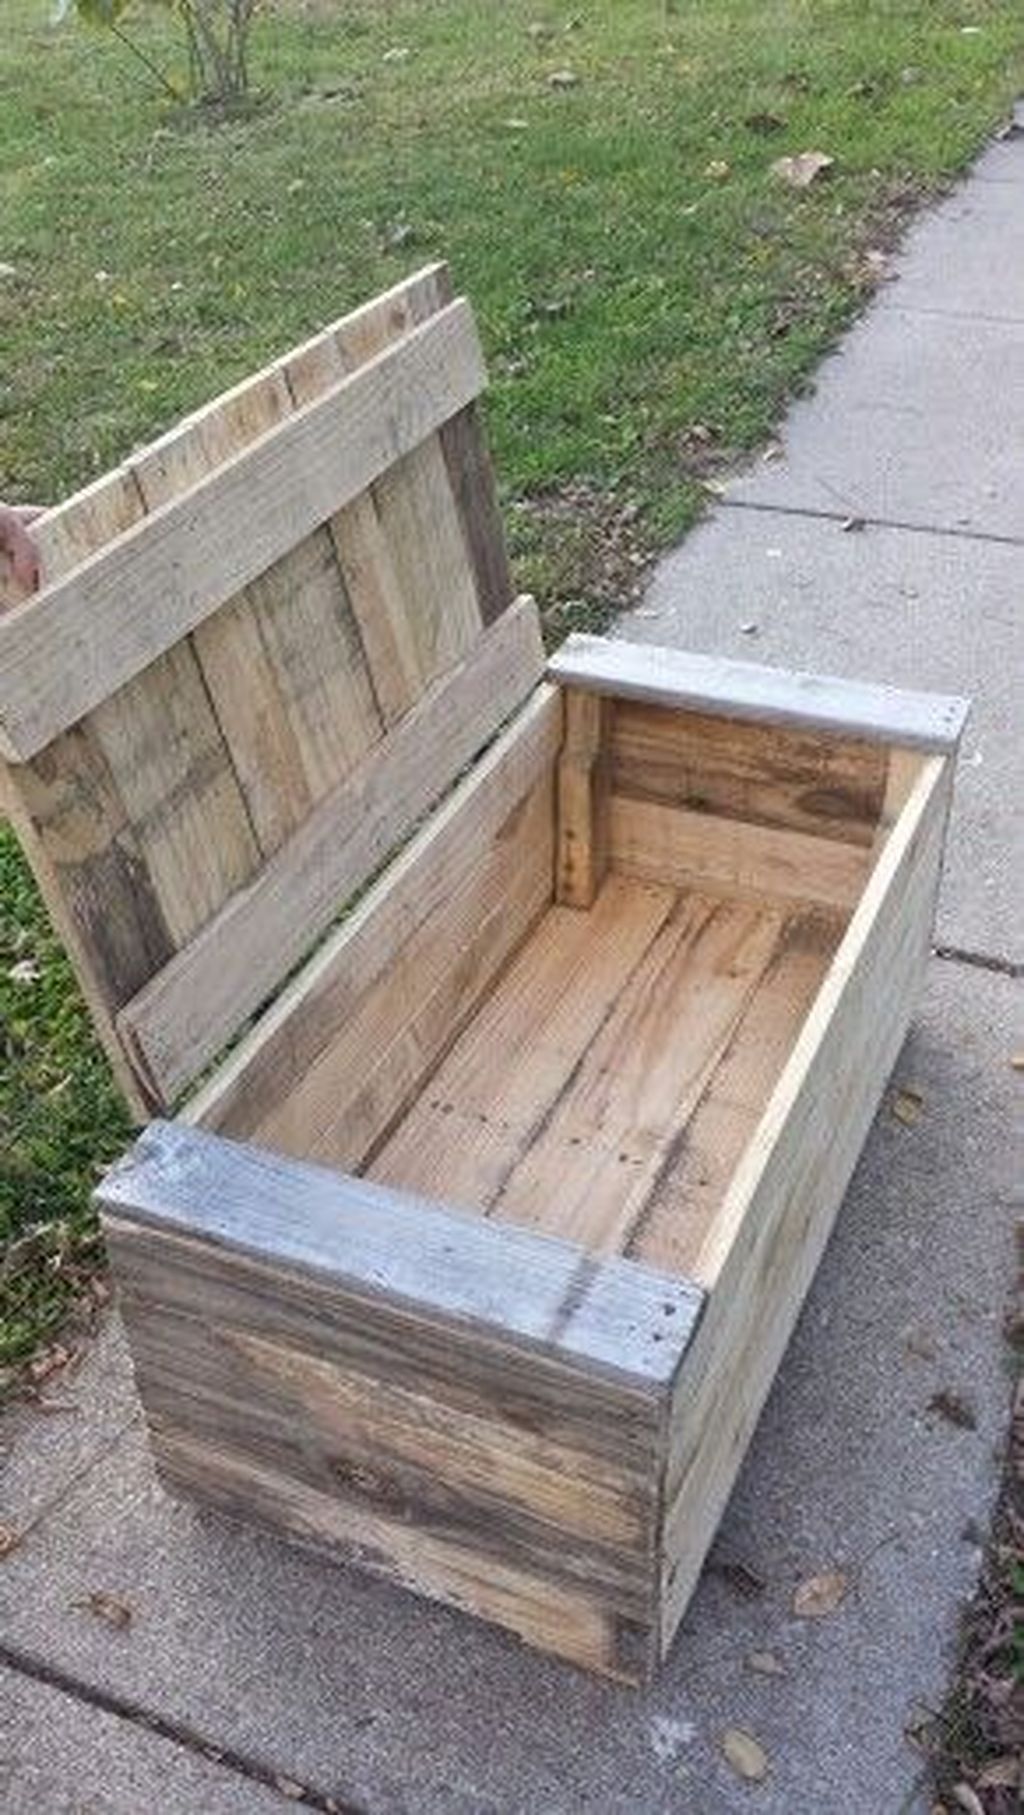
Why Pallets Are the Secret Weapon of DIY Enthusiasts
You’re not alone if you’ve ever struggled with clutter or needed extra storage space. Many households struggle to organise seasonal items, toys, tools, or sentimental belongings. But what if the solution was hiding in plain sight—and free? Enter the humble shipping pallet, a versatile material revolutionizing DIY furniture projects.
Wooden pallets are often discarded by businesses, making them an eco-friendly and cost-effective resource. According to the EPA, over 500 million pallets are produced annually in the U.S., many ending up in landfills. By repurposing them, you’re saving money and contributing to a circular economy. This project transforms pallets into a rustic, functional chest that blends practicality with personalized charm.
Step-by-Step: Crafting Your Pallet Chest
Materials You’ll Need: Start by gathering 2-3 standard pallets (ensure they’re marked “HT” for heat-treated safety), wood screws, metal hinges, sandpaper, and basic tools like a saw and drill. Optional: wood stain, paint, or a wooden heart accent for customization.
Deconstructing Pallets Safely: Carefully disassemble pallets using a pry bar and hammer. Remove nails and sand the slats to avoid splinters. Pro tip: Use a metal detector to find hidden nails! Sort slats by size—longer pieces work best for the chest’s base and lid, while shorter ones are ideal for the sides.
Building the Base: Assemble a rectangular frame using the sturdiest slats. Reinforce corners with L-brackets for durability. Add a floor by attaching slats perpendicular to the frame, leaving small gaps for ventilation—a must for storing fabrics or seasonal decor.
The Lid: Where Function Meets Precision
The lid is the make-or-break element of this project. Measure your chest’s dimensions, then build a slightly larger lid (by ¼ inch) to ensure a snug fit. Attach heavy-duty metal hinges rated for repetitive use—these prevent sagging over time. Bevel the lid’s edges with a router or sandpaper for a polished look.
Tom Gant, the creator of this design, emphasizes controlled movement: “Test the lid’s swing angle before final installation. You want it to open fully without straining the hinges.” Consider adding a soft-close mechanism or gas struts for child-friendly safety.
Personalization: Making It Uniquely Yours
This chest shines in its customizable details. The original design features a wooden heart tag with an engraved “A,” but endless possibilities exist. Use stencils to paint family initials, decoupage vintage maps, or attach brass numbers for a vintage trunk aesthetic.
For a functional twist, add interior compartments. Install dividers for tools, fabric-lined trays for jewelry, or removable bins for toys. Pinterest-worthy upgrades include chalkboard-paint labels or LED strip lighting inside for visibility.
Creative Uses Beyond Basic Storage
While designed for storage, this chest can multitask. Use it as a coffee table with upholstered padding on top, a window seat in sunrooms, or even a hidden pet bed (cut a small entrance on one side). One Reddit user shared how they turned theirs into a “holiday hub”—storing decorations, wrapping supplies, and a collapsible tree.
For outdoor versatility, treat the wood with weather-resistant sealant and use it patio-side to store gardening tools or pool towels. The robust design withstands up to 150 lbs, making it ideal for heavy items like books or workout gear.
Why This Beats Store-Bought Storage Solutions
Commercial storage units can cost $50-$300, but this project requires only $10-$20 for hinges and screws (if pallets are free). Unlike plastic bins, wood regulates temperature and humidity, protecting delicate items like photo albums. A 2023 Houzz survey found that 68% of homeowners prioritize sustainable materials—this chest delivers while adding rustic character.
Safety note: Avoid pallets marked “MB” (methyl bromide-treated). Stick to heat-treated (HT) or debarked (DB) options for indoor use.
Key Takeaways: Your DIY Cheat Sheet
1. Eco-Win: Repurposing 2-3 pallets diverts 50+ lbs of wood from landfills.
2. Custom Fit: Tailor dimensions to your space—go vertical for tight corners or extra-wide for garages.
3. Safety First: Sand thoroughly and opt for HT-grade pallets.
4. Multi-Functional: Beyond storage, use as seating, tables, or décor.
5. Cost: Save 80% vs. retail options while reducing environmental impact.
Design by Tom Gant | Estimated time: 6-8 hours | Difficulty: Intermediate