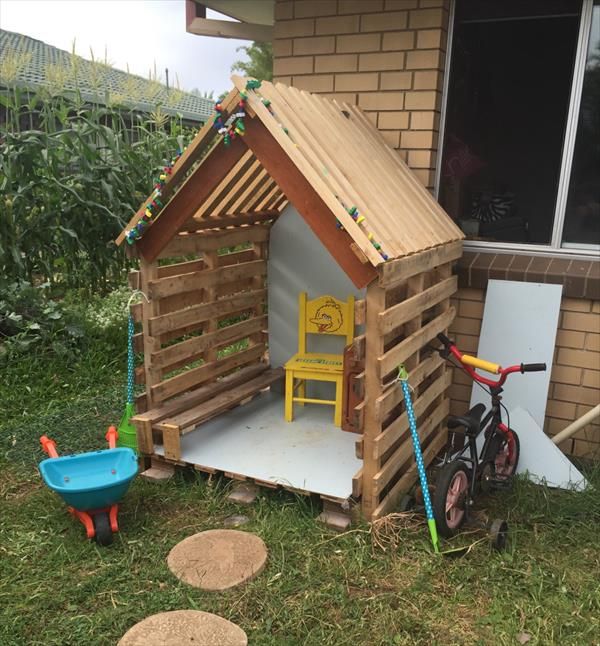
Are you looking for a unique and creative way to encourage your kids to spend more time outdoors? A DIY pallet cubby house is an excellent solution! Not only does it provide a fun and engaging play area, but it also offers numerous benefits for children with autism, promoting rehabilitation and healing through exposure to the outdoors. In this comprehensive guide, we’ll walk you through the step-by-step process of building a beautiful and functional pallet cubby house that your kids will love.
Getting Started: Planning and Preparation
Before you begin, it’s essential to plan the dimensions and design of your pallet cubby house. Decide on the size and shape of the base, taking into account the space available in your backyard. For this project, we’ll be using modified pallets, pallet stringer boards, and separated pallet deck boards. Remove any stringer boards and separate them into individual slats, which will be used to build the base and frame of the cubby house.
Building the Base and Frame
To create the L-shaped base, intermingle modified pallets and their separated slats. Use the removed stringer boards as legs, installing them securely to support the base. Fill in the top of the base with a chevron-style pattern, using resized pallet planks with sharp edges cut at an angle. This will serve as the interior accent floor.
Secure each plank in place with a nail, and add a cross beam to support the chevron filling. Create a perfect diamond burst pattern by inverting the chevron style on the second half of the filling. Use power sanders to grit the surfaces, making them splinter-free and brighter.
Adding an accent boundary around the base is a great way to finish the look. Use separated stringer boards to create a sturdy border, and install the lattice frame for the cubby house walls and overall building. Secure the pillars, cross beams, and top roof frame borders firmly, using your preferred wooden joint system.
Installing the Roof and Doors
The most challenging part of the project is building the bungalow-style chevron roof. Plan the ridges, rafters, and braces carefully, and use visual tutorials to guide you through the process. Install the shingled filling, using tiny pallet slats to fill in narrower borders and tiny corners.
Once the roof is complete, add window shutters and doors, both of which can be made beautifully using pallets. Add supports to the window shutters to keep them open, and install the windows and doors carefully.
Finishing Touches
To complete the pallet cubby house, add a few finishing touches. Install two stable stair steps made from pallets, leading up to the front entrance. You can also customize the look with paint, stain, or a wooden sealant to protect the surfaces from the elements.
Select enchanting paint colors that appeal to your kids, and add custom accents and decors to personalize the cubby house. With a little creativity, you can create a unique and inviting outdoor space that your kids will love.
Key Takeaways
- Plan the dimensions and design of your pallet cubby house carefully, taking into account the space available in your backyard.
- Use modified pallets, pallet stringer boards, and separated pallet deck boards to build the base and frame of the cubby house.
- Create a chevron-style pattern on the interior accent floor, and add a lattice frame for the cubby house walls and overall building.
- Install a bungalow-style chevron roof, using visual tutorials to guide you through the process.
- Add window shutters and doors, and customize the look with paint, stain, or a wooden sealant.
- Install stable stair steps leading up to the front entrance, and add custom accents and decors to personalize the cubby house.
By following these steps and tips, you can create a beautiful and functional DIY pallet cubby house that your kids will love. Not only will it provide a fun and engaging play area, but it will also promote physical fitness, moral lessons, and a healthy mind.